Sunday, June 30, 2013

Professions - Tailoring 1-300


There are plenty of gold making opportunities within the 1-300 range. Today we will look at gold making opportunities available simply by learning them from your local tailoring trainer. That is not to say there aren't some fabulous options from vendor purchased recipes or world drops. If you happen to prefer to not be bothered by or are limited on gold and don't want to purchase these extras then you still have options.

Finding what sells

I have checked Crafter's tomb to see what recipes are available from the trainer. Just sort the list by trainer only recipes.


You also have the option of using your crafting window in game to select items to look into.

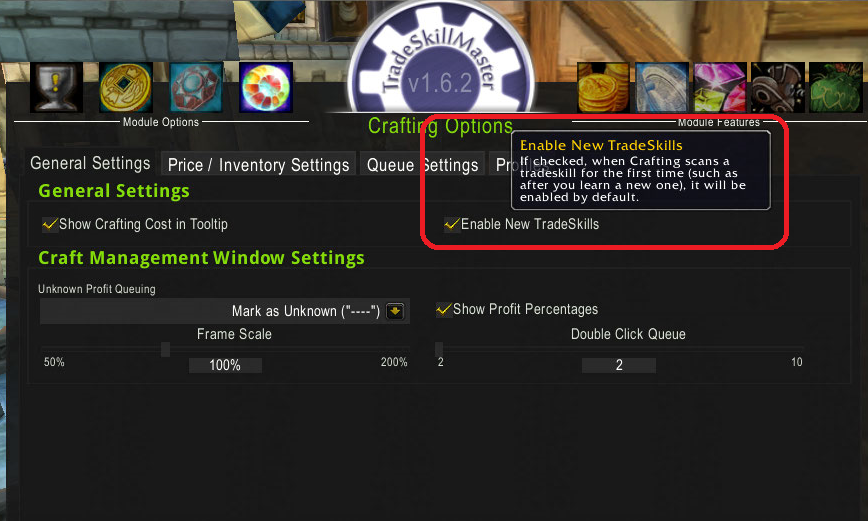
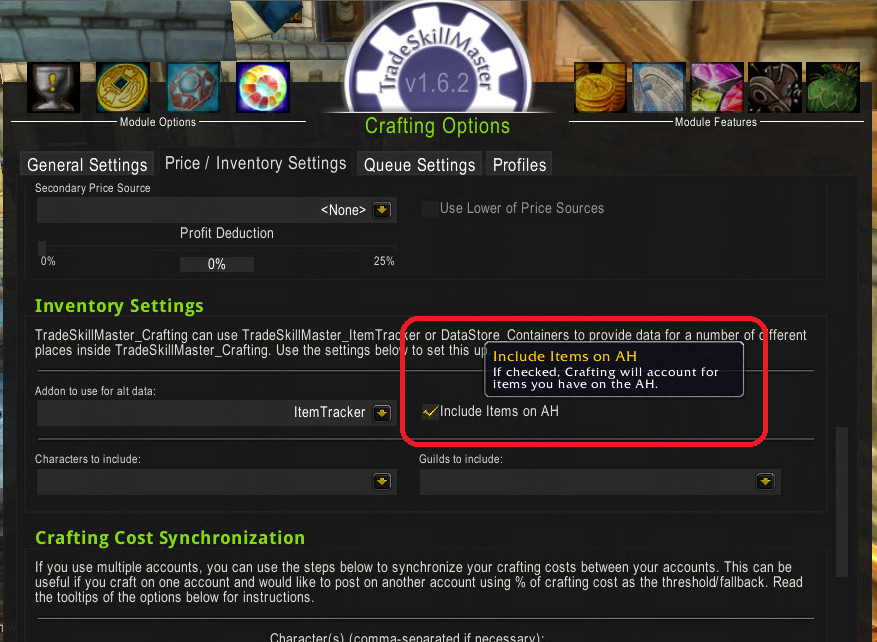
The Undermine Journal can be a great resource for looking at the history of an item. The information here can help you to determine what markets are saturated and which ones are open. Sometimes people will try and sell the items they craft when leveling. This will create periods of time where your price for the item is encroached upon. they might post the item for 5 gold even though you have it up for 50g. You have the option to buy it out or wait it out. In markets where there is occasional activity you stand to make some gold because those other posters will come and go but you will offer the item at a steady pace. On the flip side there are some markets that always have plenty of an item posted at all times. These are the ones to avoid. You will want to use The Undermine to stalk the activity of an item. You are looking for information on the long term activity of an item so don't be discouraged if someone has it posted for cheap. You are interested in longevity and not the current posting price. You will also want to look at how many of an item is posted. If one person is posting 10 of the item then you can still work into this market. If there are various people posting the same item then the market isn't going to be useful. They will endlessly undercut each other and kill the market.

You have the option of blanketing the market with a list of items to test them out, but a little research can't hurt. Simply visit The Undermine Journal and select your realm. Then you will be brought to the front page. Here you want to search for the item you'd like more information on.


This will bring up plenty of information on the item and give you some understanding of how it is behaving on your server.
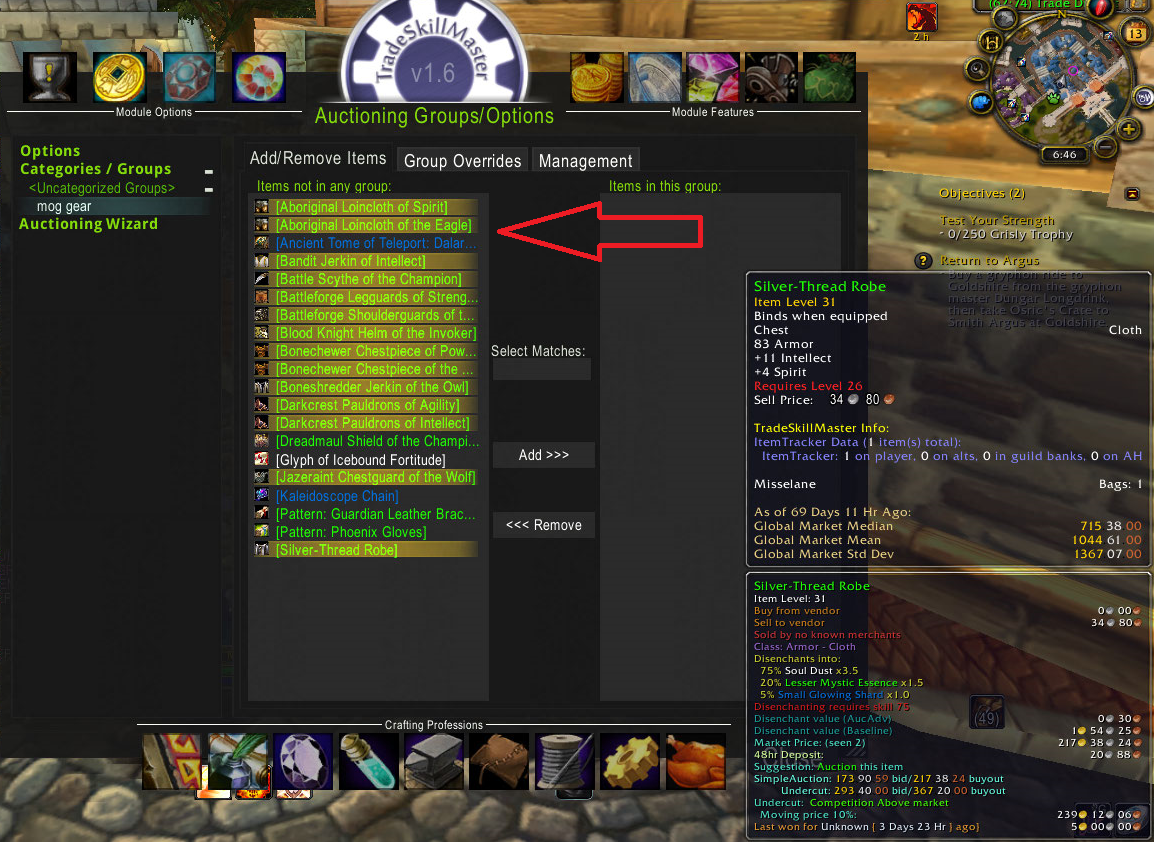
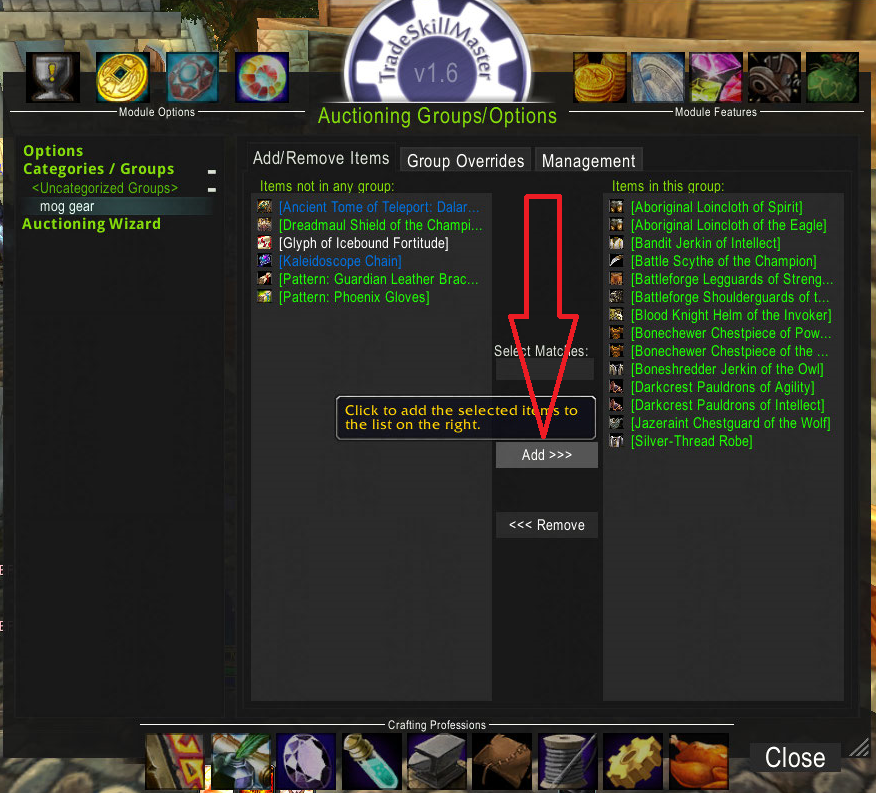
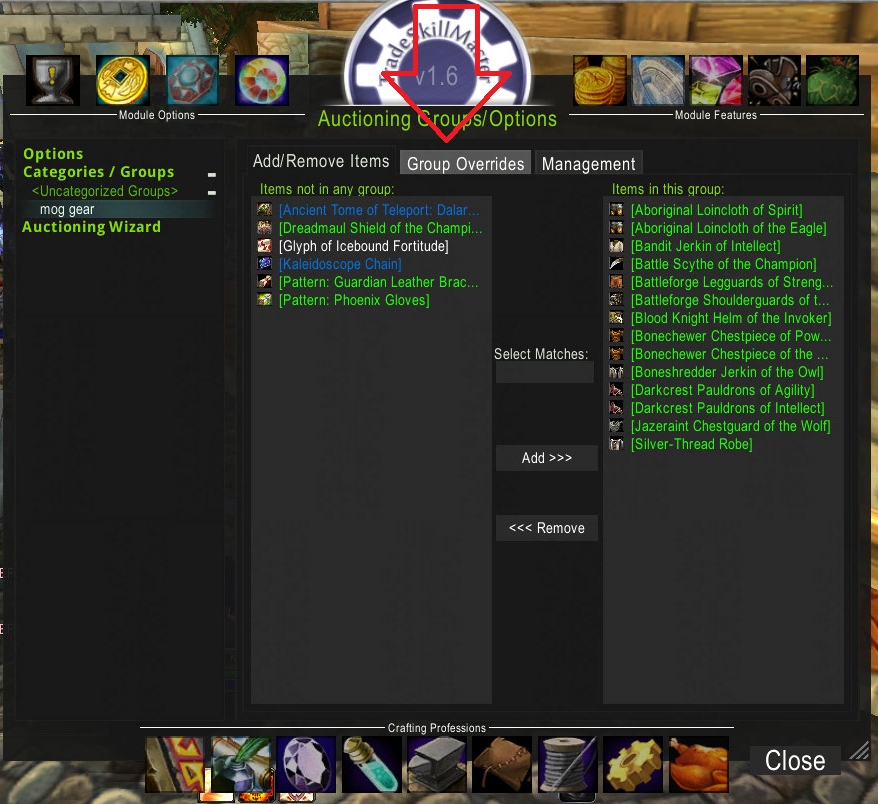
Gear for Transmog

There is quite a bit of potential for gold making when it comes to gear crafting. The rare drops that people like to use for transmog can be quite expensive on the auction house. Not everyone wants to pay a large amount for transmog items but they would like to have something that looks nice. With the slump in the transmog market with regards to the rare items I have tried out the cheaper options and they are selling fairly well. I can generally sell each item for 50 - 100 gold depending on popularity. Each item costs very little to make because I make sure to only buy the cloth at rock bottom prices. Also, keep in mind that there are still people buying items for leveling. I have seen trade complain about the high prices of gear often. Even though you can get all you will ever need while questing and running dungeons. 

So what little gems are hiding in tailoring? If we are sticking to the 100 - 300 skill range (trainer only) then we have a few things worth looking into.


Linen Cloth

Linen cloth is often quite cheap. It has a limited amount of gear that can be used for transmog as most of the linen items are of white quality. There are a few green quality items that can be useful.

Blue linen vest and simple kilt make a nice match and can be a great starting set for building a blue set.


Wool Cloth

Wool cloth is sometimes quite cheap and other times quite expensive. I sugest only buying it when it is on the cheaper side to maximize profits.

Pearl - Clasped Cloak - White cloaks seem to sell fairly well. Just keep in mind that this requires and extra purchase fromt eh auction house. The Small Lustrous Pearl can be cheap but might be hard to find actually for sale on the auction house.

Double-Stiched Woolen Shoulders - These shoulders are quite popular and seem to always be in demand.


Silk Cloth

Silk cloth was always the cheapest cloth available and there was always an abundance. On my server lately it has been scarce. I'm not sure if the drop rate was reduced or if people are simply not selling it on the auction house any more. It was so cheap at one point that I was able to buy up quite a bit and vendor it for a profit! I'm not sure if this dry spell is happening across all servers.

Spidersilk Boots - These are a nice "goes with anything" type of boot. This makes them quite popular.

Lesser Wizard's Robe - This robe is quite snazzy looking and has a rich purple color that people find appealing.

Long Silken Cloak - This purple cloak can be a great match for the various purple sets.


Mageweave cloth

Mageweave has the most options but some of the gear can be complicated to make. The key is to hold off on crafting the pieces that require special items until you can purchase the items for cheap.

Green Silken Shoulders - These are a simple, but  popular match to the green sets.

Robe of Power - This is one of the more complex items to craft. Depending on the prices of the special items and how popular it is, this one may not be worth the trouble.

Black Mageweave Leggings - These are quite popular with those looking for more... revealing gear.

Black Mageweave Vest - To match the "pants".

Black Mageweave Gloves - Also to match the "pants".

Shadoweave Robe - A nice purple robe that people often look for as part of a set.

Cindercloth Robe - A unique looking robe that should be fairly easy to make. The heart of fear seems to always be in large supply.

Conclusion

Tailoring always seems to be the outcast of professions, but I have a bit of a fondness for it. Being able to craft my own bags is priceless. On top of that there are a few items that sell quite well for me. Don't dismiss the lower bags available to train from the vendor. These can provide a modest bit of income from those not wanting to spend much on bags at the start. It takes a bit of work to test the market to find what will sell well for you but even with a brand new character there is a bit of gold to be made from tailoring.

Saturday, June 22, 2013

Trade Skill Master: Crafting Part 2


This is a continuation of the last post on the TSM Crafting Module, to see the first post click here.

So last time we gave an introduction to the crafting module and went through some very useful settings for how to get it prepared for optimal usage. This post will deal with the fun part, the implementation. We'll get to see how to check the data crafting can provide you to determine what to craft with some thoughts on keeping in mind how much to craft. We'll also be using the profession of Jewelcrafting for our module example, though of course this module works the same way with all other professions.

Implementation

We'll begin with a quick Auction House Scan. This requires you to visit the auction house and open the TSM auctioning tab. The default settings will open directly to it but you can simply click on the TSM tab at the bottom if it does not.


After choosing the profession, in this case Jewelcrafting on the left side, simply click on the "Run Profession Scan" button and wait while the addon scans the auction house for any and all materials and craftable items being sold on the auction house for the selected professions. It is also worth noting that there is a warning here stating that "Scanning the auction house in game is no longer necessary!" that points to the TradeSkillMaster Desktop Application. That application might be covered in future editions of this blog, but for now the Auction House Scan is all we need to get started.

The Auction House scan is important because it will keep the information in TSM fresh. The crafting module uses the current data to show how much profit you can make off selling an item right now. The market can fluctuate often so you always want data that is current and accurate otherwise it might tell you to craft items whose prices have dropped so much they're now not profitable to bother crafting.


Next open up TradeSkillMaster and look down at the bottom. There is a profession tab for each profession. In this case I'll be clicking on the gem icon for Jewelcrafting.


You will notice a list of items to the left side under crafts. This is an optional step you can take before opening up the crafting window. When you click on the left side on a gem color a full list of gems will appear. This will include all of the lower level gems. You have the option to filter out gems you prefer not to craft by left clicking anywhere in the row where their name appears. Doing this can cut out most of the useless information that might be provided you by TSM about things like gem cuts for gems from the last expansion or earlier.

If you right click on an item's row you will open up a new smaller window to the left side that looks like this:


At point 1 here you can see that it gives you the option to add this specific item to a shopping group for use with the Auctioning Module. At point 2 you have multiple options given for restock quantities specific to this item alone. At first these options will likely be more than you need to adjust but could be very useful in the future after your more familiar with the Crafting Module as a whole. We'll see more on Restocking too further in this guide.

Craft Management Window

To open the craft management portion you can either click on the gem at the bottom again or you can select the "Crafts" from the left side to bring up the options.


We have two options "Show Craft Management Window" and "Force Rescan of Profession (Advanced)". The forced rescan will check and ensure that you have all the latest recipes you've learned added into the crafting module for consideration. You'll click on "Show Craft Management Window" next to open up the crafting interface. This should bring up the Craft Management window for Jewelcrafting.


So now, on top of your regular crafting window for Jewelcrafting there is this large blue and black box. Already contained is the data for the profession you're looking at, so now we just need to represent it properly. As you can see here I've chosen to show the information I have on Yellow Gems and I am sorting by potential profit as determined by TSM. Not only does it show you the profit in gold per item presumably sold, but also by percentage of cost. Green is good, positive profits, and red is bad, negative profits. This will automatically adjust itself as you scan the auction house and sometimes items that make a profit one day will have cratered and be putting you in the red if you try to craft them the next day. Next lets queue up some items to craft.


At point 1 you can see we've queued up three Glinting Imperial Amethysts to craft by left clicking on the "Glinting Imperial Amethyst" text three times. If you happen to click too many times, you just need to  right click to reduce the number. At point 2 to the right you can see the current value of each, and to the left we have a set of lists that show how many of those specific cut amethysts we have on all of our characters (assuming we are sharing inventory on the same account from the settings we set earlier). At point 3 you can see the mats list is populated by all the mats needed to craft everything on the right. In this screenshot "Imperial Amethyst" is highlighted in red which means I currently have none in my bags and will need to acquire some in order to craft. Also worth noting the same appears in Glinting Imperial Amethyst which is in orange on the right side crafting list.

Crafting


At point 1 you can click Craft Next to begin crafting the top item on our crafting stage #1 list. At point 2 you see the "Clear Queue" button which will clear everything out of the list. For more automatic posting following your restock quotas and specifically only crafting what is immediately available in your inventory you can use the "On-Hand Queue" button at point 3. Finally, at point 4 the large "Restock Queue" button will populate the list automatically with crafted gems according to the parameters set in the settings earlier.

For automation purposes the Restock Queue button is great, especially if you want to just pick stuff up off the Auction House and start crafting. However, it is very important that you set up the parameters in first. The set up for this is located in the Price/Inventory Settings section of the set up. If set up properly then TSM will find all the items at the profit you select and exclude items that you have already crafted but have yet to sell. Keep in mind that these options were labeled as optional in the setup guide. They aren't necessary but you may find these advanced features a great way to streamline the process. 

Conclusion

The setup involved with this module may make it seem a bit daunting to use at first. However, as usual with TradeSkillMaster, the time taken to prepare is always worthwhile when you start seeing major returns on investment thanks to modules like this one. Its also worth keeping in mind that beyond just the Jewelcrafting example we focused on this module works exactly the same way for all crafting professions. So adapt Trade SkillMasterCrafting to suit your needs and prepare to be amazed at the time it saves you in the long run.

Saturday, June 15, 2013

Trade Skill Master: Crafting


The crafting module helps you to select the items to craft for maximum potential profit. It can look at the auction house and find materials that you can convert, using your profession, into items to sell at a profit. Keep in mind that crafting can only determine potential profit. There is no guarantee that the item will sell. It also contains features that organize the information for you. It can tell you what materials you have, what materials you need and it can queue up the items you want to craft. It is a digital list making and it is fabulous because it makes crossing off items on the list as easy as one click!

I will split the crafting module into two posts. First I will cover set up and then I will cover implementation. There is tons of information about this amazing module and I want to be sure to address as much as I can.

Settings

Some of the settings are on a default that requires little attention when starting out but can be very useful as you become more advanced. I will cover each setting and label them as optional or recommend from a beginners point of view. Feel free to poke around and see how you can make each setting work for you.

You will start out locating the Crafting Settings button at the top.


Profiles 

You will want to start by creating a profile for specific profession you wish to use. I find it helpful to do this first. Is is set to default but I have found that I prefer different settings for each profession. As you work more with the crafting addon you will fond that you prefer to tweak it a but to suit your specific needs. For now we will set up the basics.


Simply click on the profile tab and type in the profile name you wish to use then click ok.


You can always check to see which profile is active buy checking the "Current Profile:" listed.


General Settings


Show crafting cost in tooltip (Optional to change. The default is recommended)  - This will add the cost of making an item to the tooltip when you hover over the item. This feature will help prevent you from selling an item for less than it costs to craft it.


Enable new tradeskills (Optional to change. The default is recommended) - When you learn a new tradeskill this option will cause the module to automatically enable it.


Unknown profit queuing (Optional) - When items have an unknown profit price then this gives you the option to use your auctioning modules information to fill in that information. If the item has been placed in an auction group then the price you have set will be reflected as the profit price instead of the auction house price. You can either set it to show you the auctioning group price or simply make it as unknown. 


Show profit percentages (Optional) - When checked this adds a percentage as well as a profit price in the craft management window.


Frame Scale (Optional) - Adjusts the scale of the craft management window.


Double click queue (Optional) - This sets the amount of increase and decrease that will occur when you double click on a craft.


Price/Inventory Settings


Get mats price from (Optional) - When determining the cost of material for the items you craft you can choose from various sources. The default is set to AuctionDB - Market Value. This will give to the most up to date current materials price directly from the auction house. 


Get craft prices from (Optional) - When determining the value of crafted items you will make you can choose from various sources. The default is also set to AuctionDB - Market Value. This will give to the most up to date current price directly from the auction house. 


Secondary price source (Optional) - When something isn't returning a valid price then the module will look to this source for the price. 


Use lower of price sources (Optional) - When checked then crafting will use the source with the lowest profit as it's profit price. 


Profit deduction (Optional) - Percent to deduct from the profit price. Often set to 5% to account for the auction house cut if an item sells.


Addon to use for alt date (Optional)  - TSM has a built in ItemTracker it will use but you have the option of using an alternative addon if you prefer.


Include items on auction house (Recommended) - By checking this box you will be tracking the items you have posted on the auction house as well as the items in your character(s) bags.


Characters to include (Recommended) - This lets you include multiple characters to look at when determining what materials you have and what items to have. If you sell items on a separate character from the one who is the crafter then you will want to add both.


Guilds to include (Optional) - This feature will let you include any guilds that you have when evaluating what materials you own. This is ideal if you have a private guild you use to store materials or crafted items.


Step 1 (on banking account) Character(s) (Recommended if using different characters to craft and post)  - If you happen to use more than one account and you need the accounts to communicate what is on both of them then you will want to fill in this feature. Here you list the "banking" character(s). So if you have a crafter on one account and the character you use to sell the items on another account then this is where you would add the character who sells the items.


Step 2 ( on crafting account) Characters(s) (Recommended if using different characters to craft and post) - If you happen to use more than one account and you need the accounts to communicate what is on both of them then you will also want to fill in this feature. Here you list the "crafting" character(s). So if you have a crafter on one account and the character you use to sell the items on another account then this is where you would add the character who crafts the items.


Send crafting costs button (Recommended if using different characters to craft and post) - This is used when you have both accounts open to start them communicating. I like to use this feature after scanning the auction house.


Queue Settings


Minimum profit method (Optional) - Here you get to select what is worth your crafting time. You have the option to set a specific gold amount you wish you make as a minimum or you can set it as a percentage. 


Min restock quality (Optional)- If you prefer to not craft just one of an item and prefer to always craft more than one then you can set this as the minimum you wish to craft for each item.


Max restock quality (Optional)- This lets you set the maximum you wish to craft of each item. This is useful for preventing too much of an overstock.


Minimum profit (in %) (Optional)- When an item has a profit over this percent amount then it will automatically be added to your queue when you use the restock button.


Minimum profit (in gold) (Optional)- When an item has a profit over this gold amount then it will automatically be added to your queue when you use the restock button.


Filter out items with low seen count (Optional) - Checking this box will filter out items that have not been seen much on the auction house.


Seen count source (Optional) - This lets you select where you want to have your information regarding how many items have been seen on the auction house. 


Seen count filter (Optional) - Any item that has been seen less than the amount you place in this box will be filtered out.


Ignore vendor items (Optional) - Checking this box will cause you to ignore the vendor items needed to craft.


Limit vendor item price (Optional) - This option lets you ignore vendor items below a specific amount.


Maximum price per vendor item (Optional) - This is where you list the maximum amount you wish to be ignored with regards to vendor items.

Conclusion

The set up of this module isn't too bad to start. there are only a few items to address before you can get started. The versatility of this module makes it quite useful. You have a wide variety of options to choose from so that you can set it up for your specific needs. I simply love the option to be able to sync up multiple accounts.

Up next: We will implement the crafting module and make some items to sell. 

Sunday, June 9, 2013

Trade Skill Master: Canceling and re-posting


This feature of TSM is what puts TSM users way ahead of other gold makers. TSM offers a quick and easy way to cancel the auctions in which you have been undercut so that you can re-post them, but wait there's more! Not only will it find where you have been undercut, but it will find auctions that can be re-posted at a higher price. How amazing is that!

Canceling


You will need to go to the auction house and open the TSM tab. If you have left it to default then TSM will automatically open when you click on an auctioneer. Find the Cancel auctions button on the left side list under Auctioning.


Keep in mind that when canceling it will use the posting parameters that you have set up to determine what to cancel. If you haven't added an item to an auctioning group then it will automatically cancel it.

TSM will start by scanning all of your items and giving you an action description. This might include "Canceling an auction in which you have been undercut", "Canceling to re-post at a higher price" or "Not canceling auction below threshold".


Once the scan is complete you can cancel each auction individually by clicking the cancel button at the bottom or by using the macro we set up when we created groups. Simply hold down the Ctrl button and move the scroll wheel on your mouse.

All that is left is to head to the mail box to pick up your items and re-post them like you normally would.

Why cancel and re-post?

This feature can be very useful in situations where you are undercut frequently. Sometimes the market can be so saturated that it doesn't take long for someone to come along and post the same item. This is true for commonly used items from professions. One good example is the shoulder enchants made with inscription. They tend to sell well and people know it. You will find that even non-gold makers will be posting such items. In slower markets this competition would be cause to reconsider even joining but with items that everyone buys often it can still be worth it. Essentially, every time you cancel and re-post these items you will have a window of time where yours will sell. Canceling and re-posting often will increase the time your item spends at the sweet spot.

If you find that you are undercut often by one specific character then I recommend adding them to your friends list. This is so you know every time they log in and you can then cancel and re-post once they have finished their posting. In cut throat markets this is a way to stay ahead of the competition. If you notice that you are undercut the moment you post then it is likely they have used this trick. To counter, you have the option of using the Mobile Armory App which will not show you actually log on. It has an auctioning feature in which you can stealthily undercut. Keep this in mind if you are still being undercut even when the your competition is not online.

How often do I cancel and re-post?

This really depends on the market and your competition. You will need to test out the market to see how often your competition is undercutting you. Keep in mind that The Undermine Journal has a great feature that tracks the selling habits of all sellers. Some sellers log on and post at the same time every day. To gain an advantage all you need to do is schedule your posting after theirs. In contrast you want to make your posting habits erratic so your competition can't pinpoint a good undercutting spot. Misselane isn't getting much love since she hit 2k liquid but you can view her activity here. You can search for any character by just entering their name in the search box but be sure to select your realm first.

Conclusion

This option in the auctioning module is a great feature if you want to be more active about your gold making. Simply re-posting once things have expired might not be enough to make it worth it for some markets. The canceling option is a great feature and it is so easy to use.


Per request, I will address the Crafting module of TSM next. It is great for getting the most out of your professions so stay tuned!

Saturday, June 1, 2013

Trade Skill Master: Auctioning


TradeSkillMaster has included this module specifically for the purpose of posting auctions quickly. The beauty of this module is that you can sell hundreds or thousands of items and only use a fraction of the time that you would posting manually. This module supersedes even some of the best auctioning addons.  

To open TradeSkillMaster just type /tsm in your chat window.

The first time you open TSM you will be prompted to select Beginner or Advanced user. I recommend that you select Advanced. This will make all the options available to you.

The auctioning module can be identified by the gold seal looking icon on the left.


The first thing you will want to do is to click on options under the general tab and go to the bottom and make the posting macro. This is a priceless option to use. It makes posting go so much faster. It will create a macro that will allow you to simply hold down the Ctrl key and move the scroll wheel on your mouse to post. 


White List Tab


This feature lets you add a players name to a list that will never undercut them. You will only post at their current price. That way, if you have a friend who also auctions things, you don't have to worry about undercutting them. You do not need to add any characters from the account you are posting from but if you have a second account you will need to add each character you wish to never undercut.


Black List Tab


The black list feature does the opposite of the white list. It undercuts the characters that you add to the list even if it is below the lowest amount that you set for items. This can be a tool used for aggressively pushing competition out of the market or to push their prices down to the point where you will buy their items. I recommend using this feature sparingly if at all. 


Creating Groups

This section is where you will create rules for how you want your things to be auctioned. You will be able to make different groups with a different posting setup for each group. To start we will click on the Categories/Groups section. The difference between categories and groups is that groups will be subsets of categories. You can make groups and never categorize them if you prefer. The advantage of categories is that it helps you to better organize large batches of varied things. To start we will create our groups.


The first step in creating a group is naming it. We will click on Create Category/Group


Here we will enter in the name we want to use for the group and click Okay.


This will bring up the option to add items to our new group. 


You will notice on the left side are the items in your bag that are not in a group yet. You will select the items that you wish to add to this group. You have the option to select them one at a time or select multiple. You will click on an item once to select it and you can click on the same item again to deselect it.


When you click on an item or items it will show them as highlighted like above. After you have selected the items you want to add to the group you will click the Add button in between the two lists.


If you have accidentally added something or simply wish to remove an item then you can highlight it on the right side and click the remove button.

Next we will create the parameters for posting. We will start by clicking on Group Overrides.


Here you will find a lot of options to help you create just what you need for each group. I recommend you take a look at each setting and read what it does. Each one has a great description to help you customize each posting group. 

General Settings

Please Note: To access the drop down menus you have to right click to unlock the window then left click to access the choices.

  • Ignore amount settings (Optional) -  This allows you to ignore more than or less than a specific amount. This is useful for when you want to cater what you post to a specific use. For example, if [Awesome Thing] is used for a recipe and it always take 4 of them to craft the item then I might sell [Awesome Thing] in stacks of 4. This feature goes a step further and lets you ignore any posts that are under a stack of 4 or above a stack of 4 when the addon looks at what price to post at. There might be a stack of 2 [Awesome Thing]s for super cheap but it is unlikely anyone will want to purchase it because 4 is always needed. This feature is reserved for very specific situation and can be left alone most of the time. It might be used rarely, but it is such a great feature to have when you need it.


  • Ignore low duration auctions (Optional) -  This gives you the option to ignore posts that only have a specific time left before they expire. It gives you the option to ignore anything that only has 30 minutes, 2 hours or 12 hours left. 


Some additional features in the general section include the ability to do the following: 
  • Disable auto canceling  (Optional) - This will cause nothing in this group to be canceled if you are undercut
  • Disable posting and canceling  (Optional)   This group is completely disabled when the addon tries to post or cancel anything on the auction house
  • Common search terms  (Optional)   You can add terms to reduce the amount of things the addon has to search through when determining how to post things. For example, if this group contains nothing but glyphs then you could add "Glyph of" into this box and it would only search through the items that had the words "Glyph of" in them instead of the entire auction house. If you add nothing to the search box then it will run a default scan.
  • Ignore random enchants (Optional) - This is a good way to post things like gear that you are posting for the purpose of transmogrification. There is often gear that is labeled [Super Helm of the Bear] or [Super Helm of the wolf]. Both of these items will have the same appearance but each will have different stats attached the the base stats. In order to differentiate them Blizzard has added "of the" followed by a designation. The usefulness of this comes into play when you are posting [Super Helm of the Bear] and your competitor is posting [Super Helm of the wolf]. It ensures that you will undercut them. Using the feature will cause you to consider all things that are [Super Helm of the ____] items.


Posting Settings

The post settings include the following:

  • Post time (recommended of you wish to have a post that is longer than 12 hours) - This allows you to set the duration of your auction.
  • Post cap  (recommended if you wish to post more or less than 4 of an item) - This lets you set the maximum number of an item you wish to post.
  • Per auction  (recommended if you wish to post stacks that contain greater than 1 item)- This is where you set how many items you want in each stack. If you want to sell items in stacks of 5 then you would set it to 5.
  • Use per auction as cap  (Optional) - This feature will post any extra items you have left over from your stacks. If you have it set to post in stacks of 5 and you have 22 of the items then this will post 4 stacks of 5 and then post one stack of 2. Sometimes a second posting must be done to post the extras.


General Price Settings

If you scroll down you will find the undercut bid options. You have two choices:

  • Undercut by (Optional) - This lets you select the amount you wish to undercut your competitors by. The most common amount is 1 copper so this is set as the default.
  • Bid percent (Optional) - Alternatively you can choose to undercut by a percent instead of a set amount. 


Minimum and Maximum Price Settings

Of all of the settings these are the most important. These will determine how high and low you will post your items for.

Minimum Price Settings (recommended)
  • Price Threshold - This is the lowest price you are willing to sell the item for. If the price that other post at is lower than this then you will not undercut them.
  • Set Threshold as a - This gives you the option to set your lowest amount as a fixed gold amount or as a percentage.


Maximum Price Settings (recommended)
  • Fallback price - This is the highest price you will post the item for is none are for sale to undercut. 
  • Set fallback as a - This gives you the option to set your highest amount as a fixed gold amount or as a percentage.


Advanced Price Settings (Reset Method)

Reset Method (Optional) - When the lowest price is too low for you to undercut you have a few options to choose from here. 
  • Custom Value - It will post at a customized amount other than your lowest or fallback.
  • Post at Fallback - It will post at the price you have set as your fallback.
  • Don't post items - It will not post the items at all.
  • Post at threshold - It will post the items you have set as the lowest you are willing to sell them for.

Reset Scan Settings

Reset Scan Settings (Optional) - Here you will have the option to add the items in this list to the reset scan. By enabling this option the addon will look for the items you have placed in this group and for the purpose of resetting the price on that specific item. Resetting the market is when you buy out all of the available items so that you can re post them at a higher price therefore resetting the market average of the item.

To activate this portion just right click on the "include in reset scan" and then left click to check the box. This will open up more options.

  • Max reset cost - The maximum amount TOTAL (not per-item) you want to spend to reset this item.
  • Set max reset cost as a - You can set your TOTAL amount as a fixed amount or as a percent. 
  • Min reset profit - Here you set the minimum profit per-item that you want to make.
  • Set min reset price as a - You can set your minimum profit per-item as a fixed amount or as a percent.
  • Max quantity to buy - This is where you select the minimum number of items you are willing to buy in order to reset.
  • Price Resolution - This determines what size range should be considered a single price point for the reset scan. If you set it to 1 gold then 20g and 21g will be considered the same price level.
  • Max price per item - This is where you select the maximum number of items you are willing to buy in order to reset.

Posting


Once you have completed the set up for each group then it is time to post your items. You open TSM by clicking on the auctioneer. You might have to click the tab at the very bottom of the auction window but it is set to open directly to TSM by default. Next look for the "Post Auctions" button and click.


This will start the process of the addon scanning your bags and preparing the items to be posted. Once all items have been scanned for posting you have two options.

You can click the "Post" button at the bottom once for each item
or
You can use the macro we made at the start.To use the macro all you need do is to hold down the Ctrl button while you move your scroll wheel on your mouse. 


Using the macro will speed the process up quite a bit and you will see the automatic posting progress bar count down until all items are posted. For me that is 11/11 items. You do not have to remain at the auction house when the task bar fills. Once you have reached the max to post (11/11 here) then you can walk away but you will experience a bit of lag until all the items are posted.


This completes the full breakdown of the TSM Auctioning module. It is full of so many awesome features. It is not necessary to use all of them but it is quite nice to have access to them. 

If you prefer to see this module broken down via video then I highly recommend Faid's TradeSkillMaster Guide (TSM) - Auctioning and Group Creation video.

Happy Auctioning!

Trade Princess